Hasbro Design Engineering Co-Op (NERF)
I worked as a Design Engineer Co-op at Hasbro in the NERF Team from July - December 2021. My days would involve concept ideation, calculations, CAD, simulations, iteration, rapid prototyping, and working in the shop. I’ve created many original working prototypes to be used in kid testing ranges.
In accordance with Hasbro’s confidentiality policy, I am only able to disclose limited images with minimal detail of projects completed during this co-op. Numerical data will be redacted.
One-Trigger Dart Launching Mechanism
The Ultra product line is a series of motorized blasters that detect and only fire Ultra darts. These blasters typically have a secondary trigger, which the user pulls to start up the motors, which in turn spin the flywheels. Separately, the user then pulls the main trigger to fire the Ultra dart into the flywheels and out the blaster.
For this prototype, we wanted a mechanism that would eliminate the need for the secondary trigger while also launching the dart into the flywheels with an initial velocity.
Eliminating the Secondary Trigger
I began by eliminating the secondary trigger and working backwards, assessing the existing mechanism and seeing what part(s) I could modify to serve the same function. I found a part that would travel in the same direction as the secondary trigger and modified it to activate the motors with a single trigger pull.
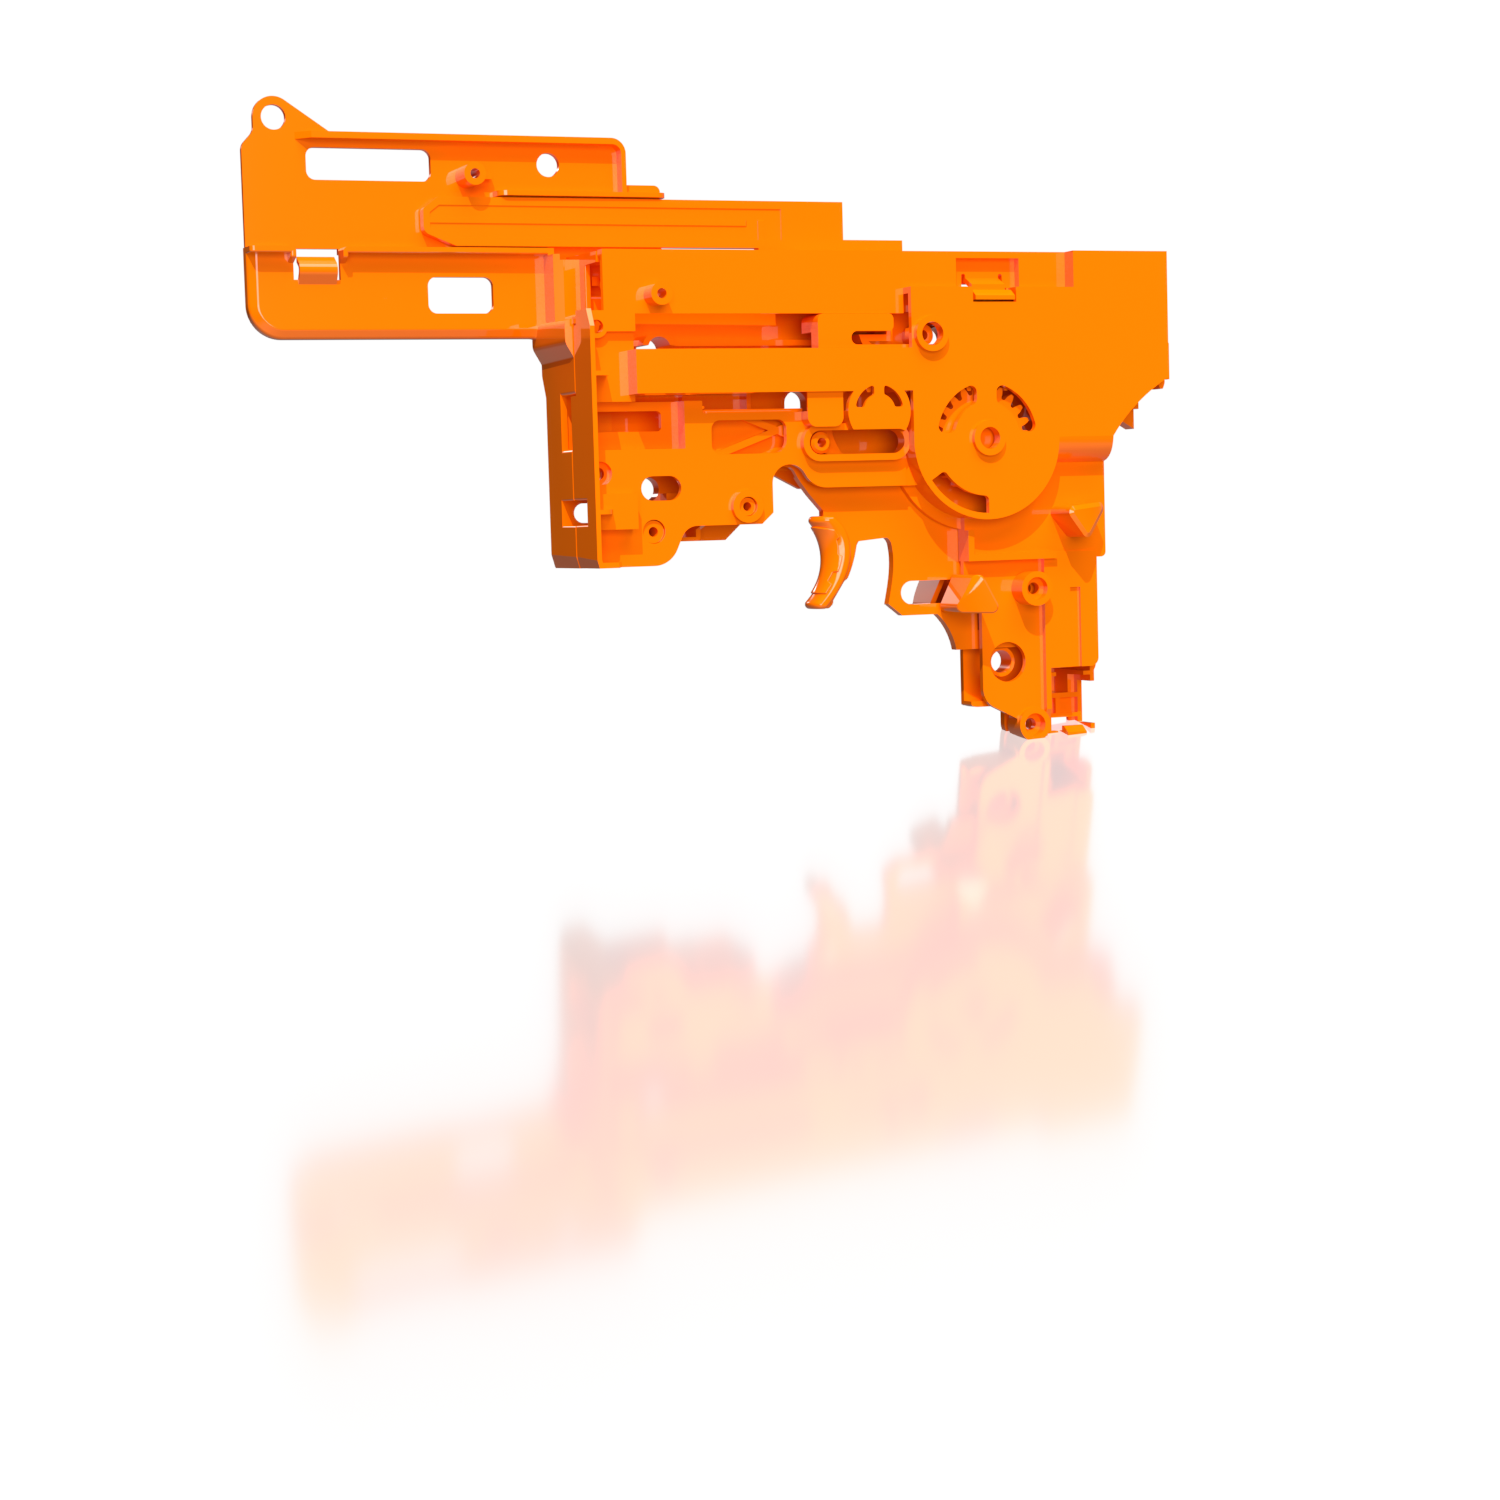
Dart Launching Mechanism
This mechanism is original, although it does take some existing parts from the on-shelf Ultra Amp.
My ideation and build process is as follows:
1: Brainstorm
I begin by separating the steps of an initial mechanism, numbering the sequence of events. I then assess those events for problems, considering interferences, part geometry, contact points (friction).
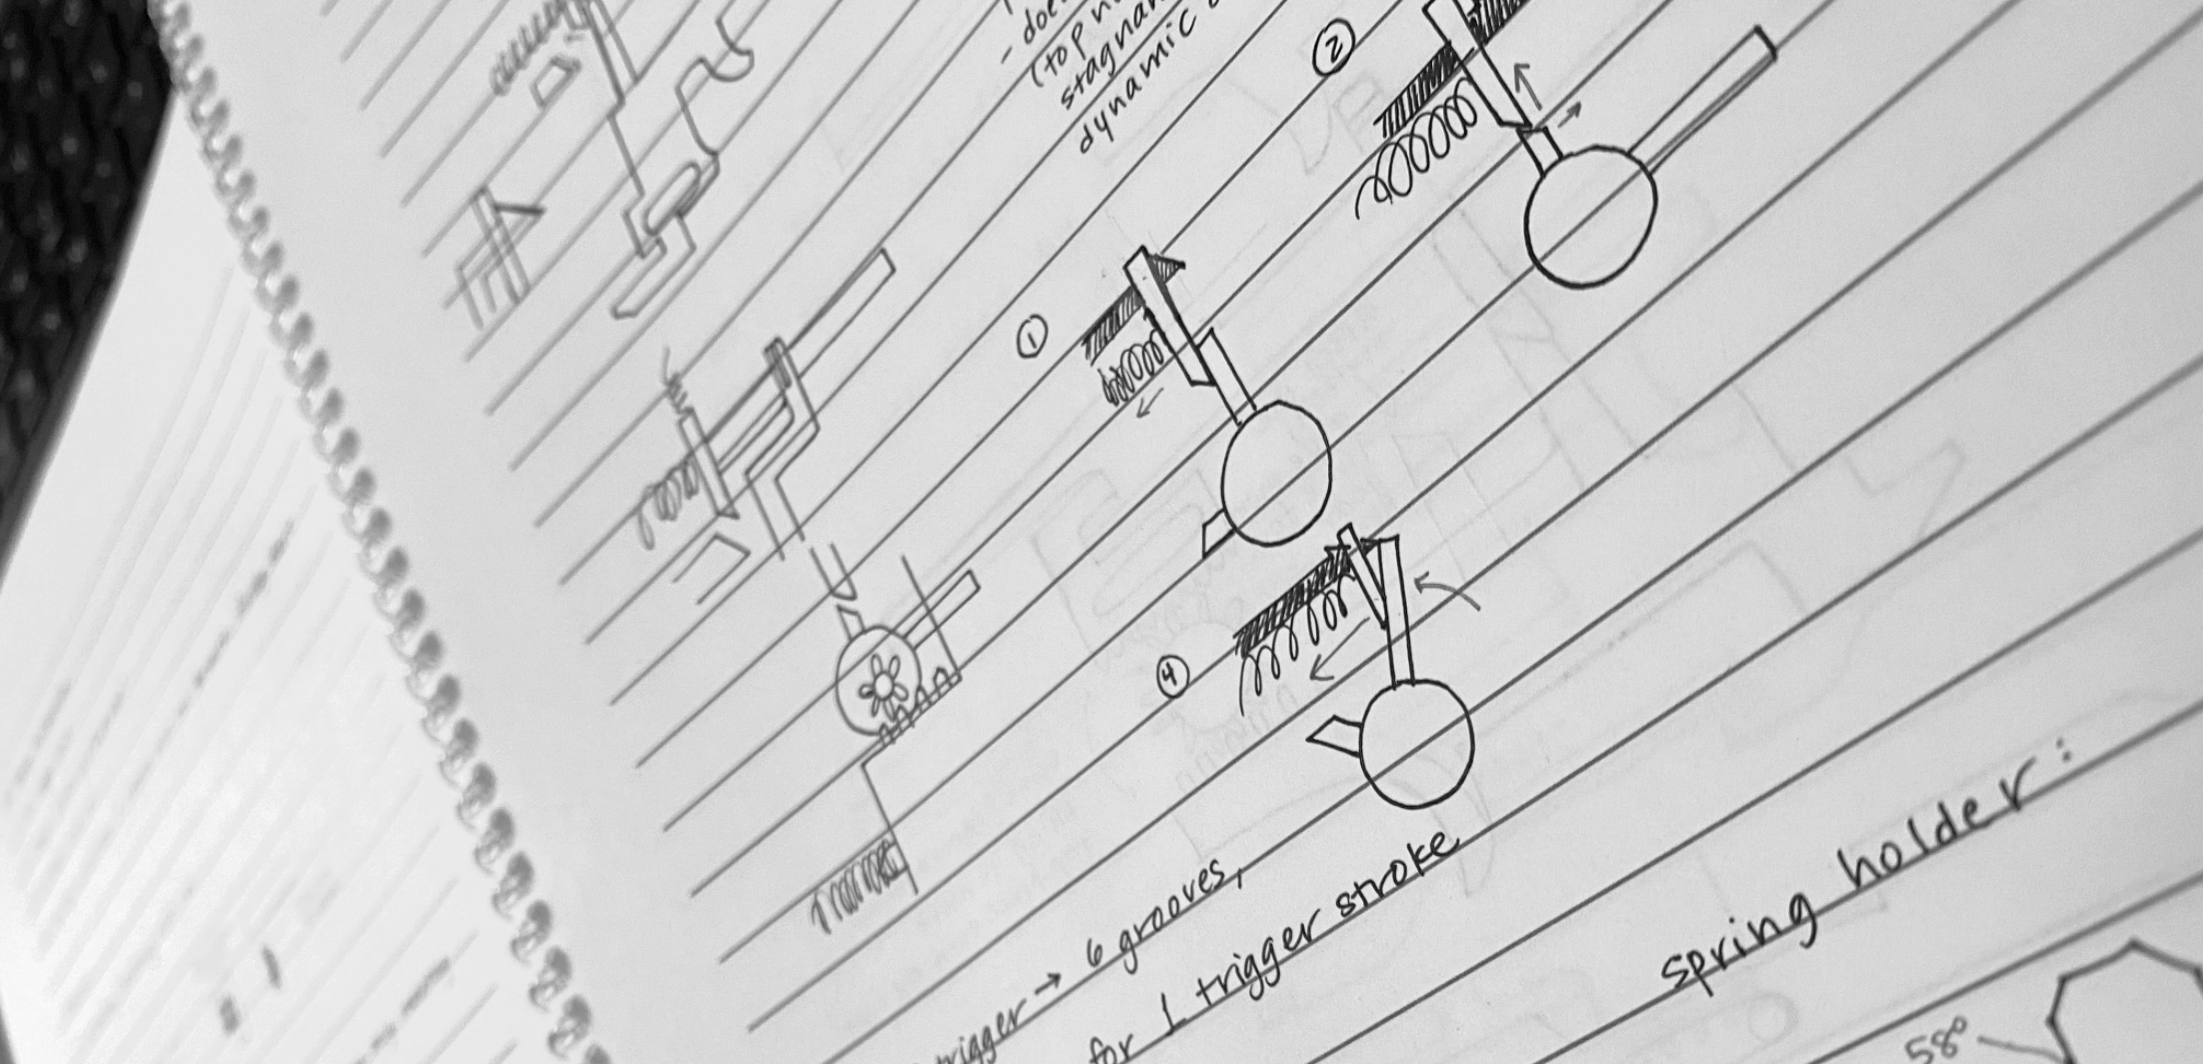
2: Ideation
Here, I start sketching high-level ideas of parts that interact with each other in the mechanism. I take notes on the pros and cons of each part interaction. Gradually, a couple of full mechanisms are developed.
I start deciding how I want to modify existing parts and create new ones, sketching and adding dimensions in my notebook.
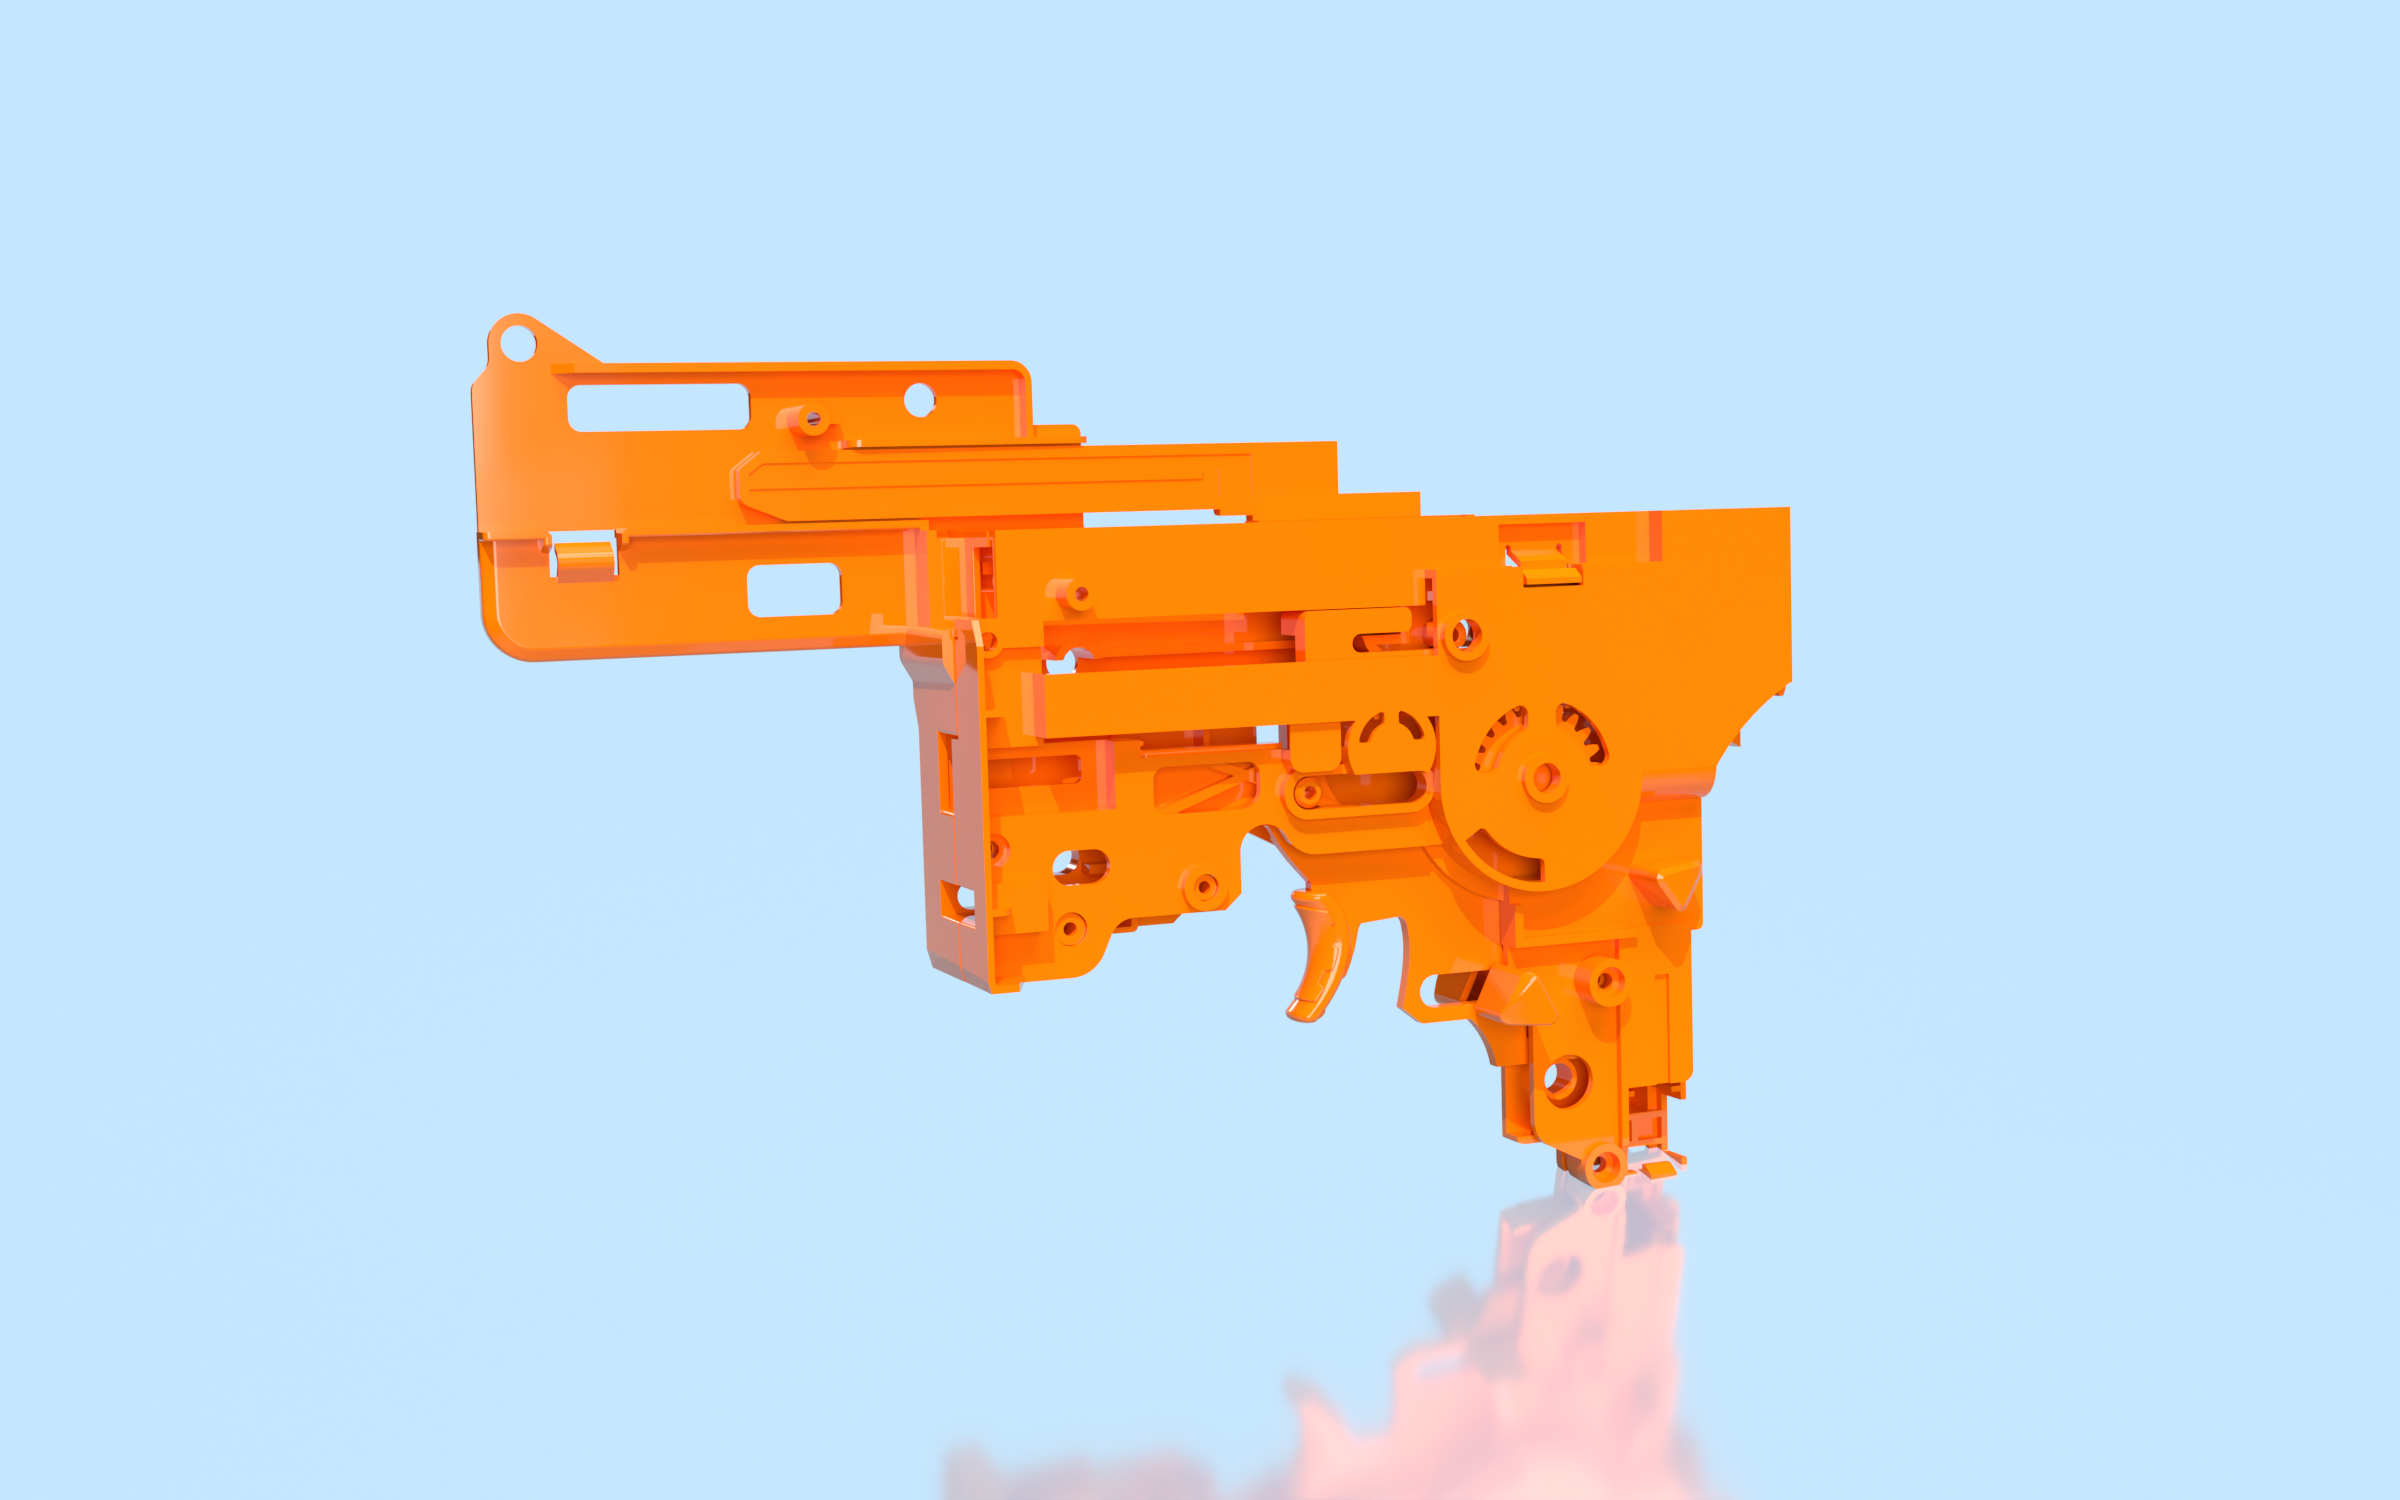
3: CAD
Next, I pull up the CAD for the on-shelf Ultra Amp. I isolate the mechanism and any other relevant parts, using Pack-and-Go to create my own CAD playground. I use SolidWorks ConfigurationManager to manage the different versions of parts and assemblies I make.
I use SW Interference Detection to check that the parts have enough tolerancing and clearances as they move in the mechanism. I also utilize SW Motion Analysis to check that the force required to operate the mechanism (pull the trigger) does not exceed the maximum value for children of this age range (8+).

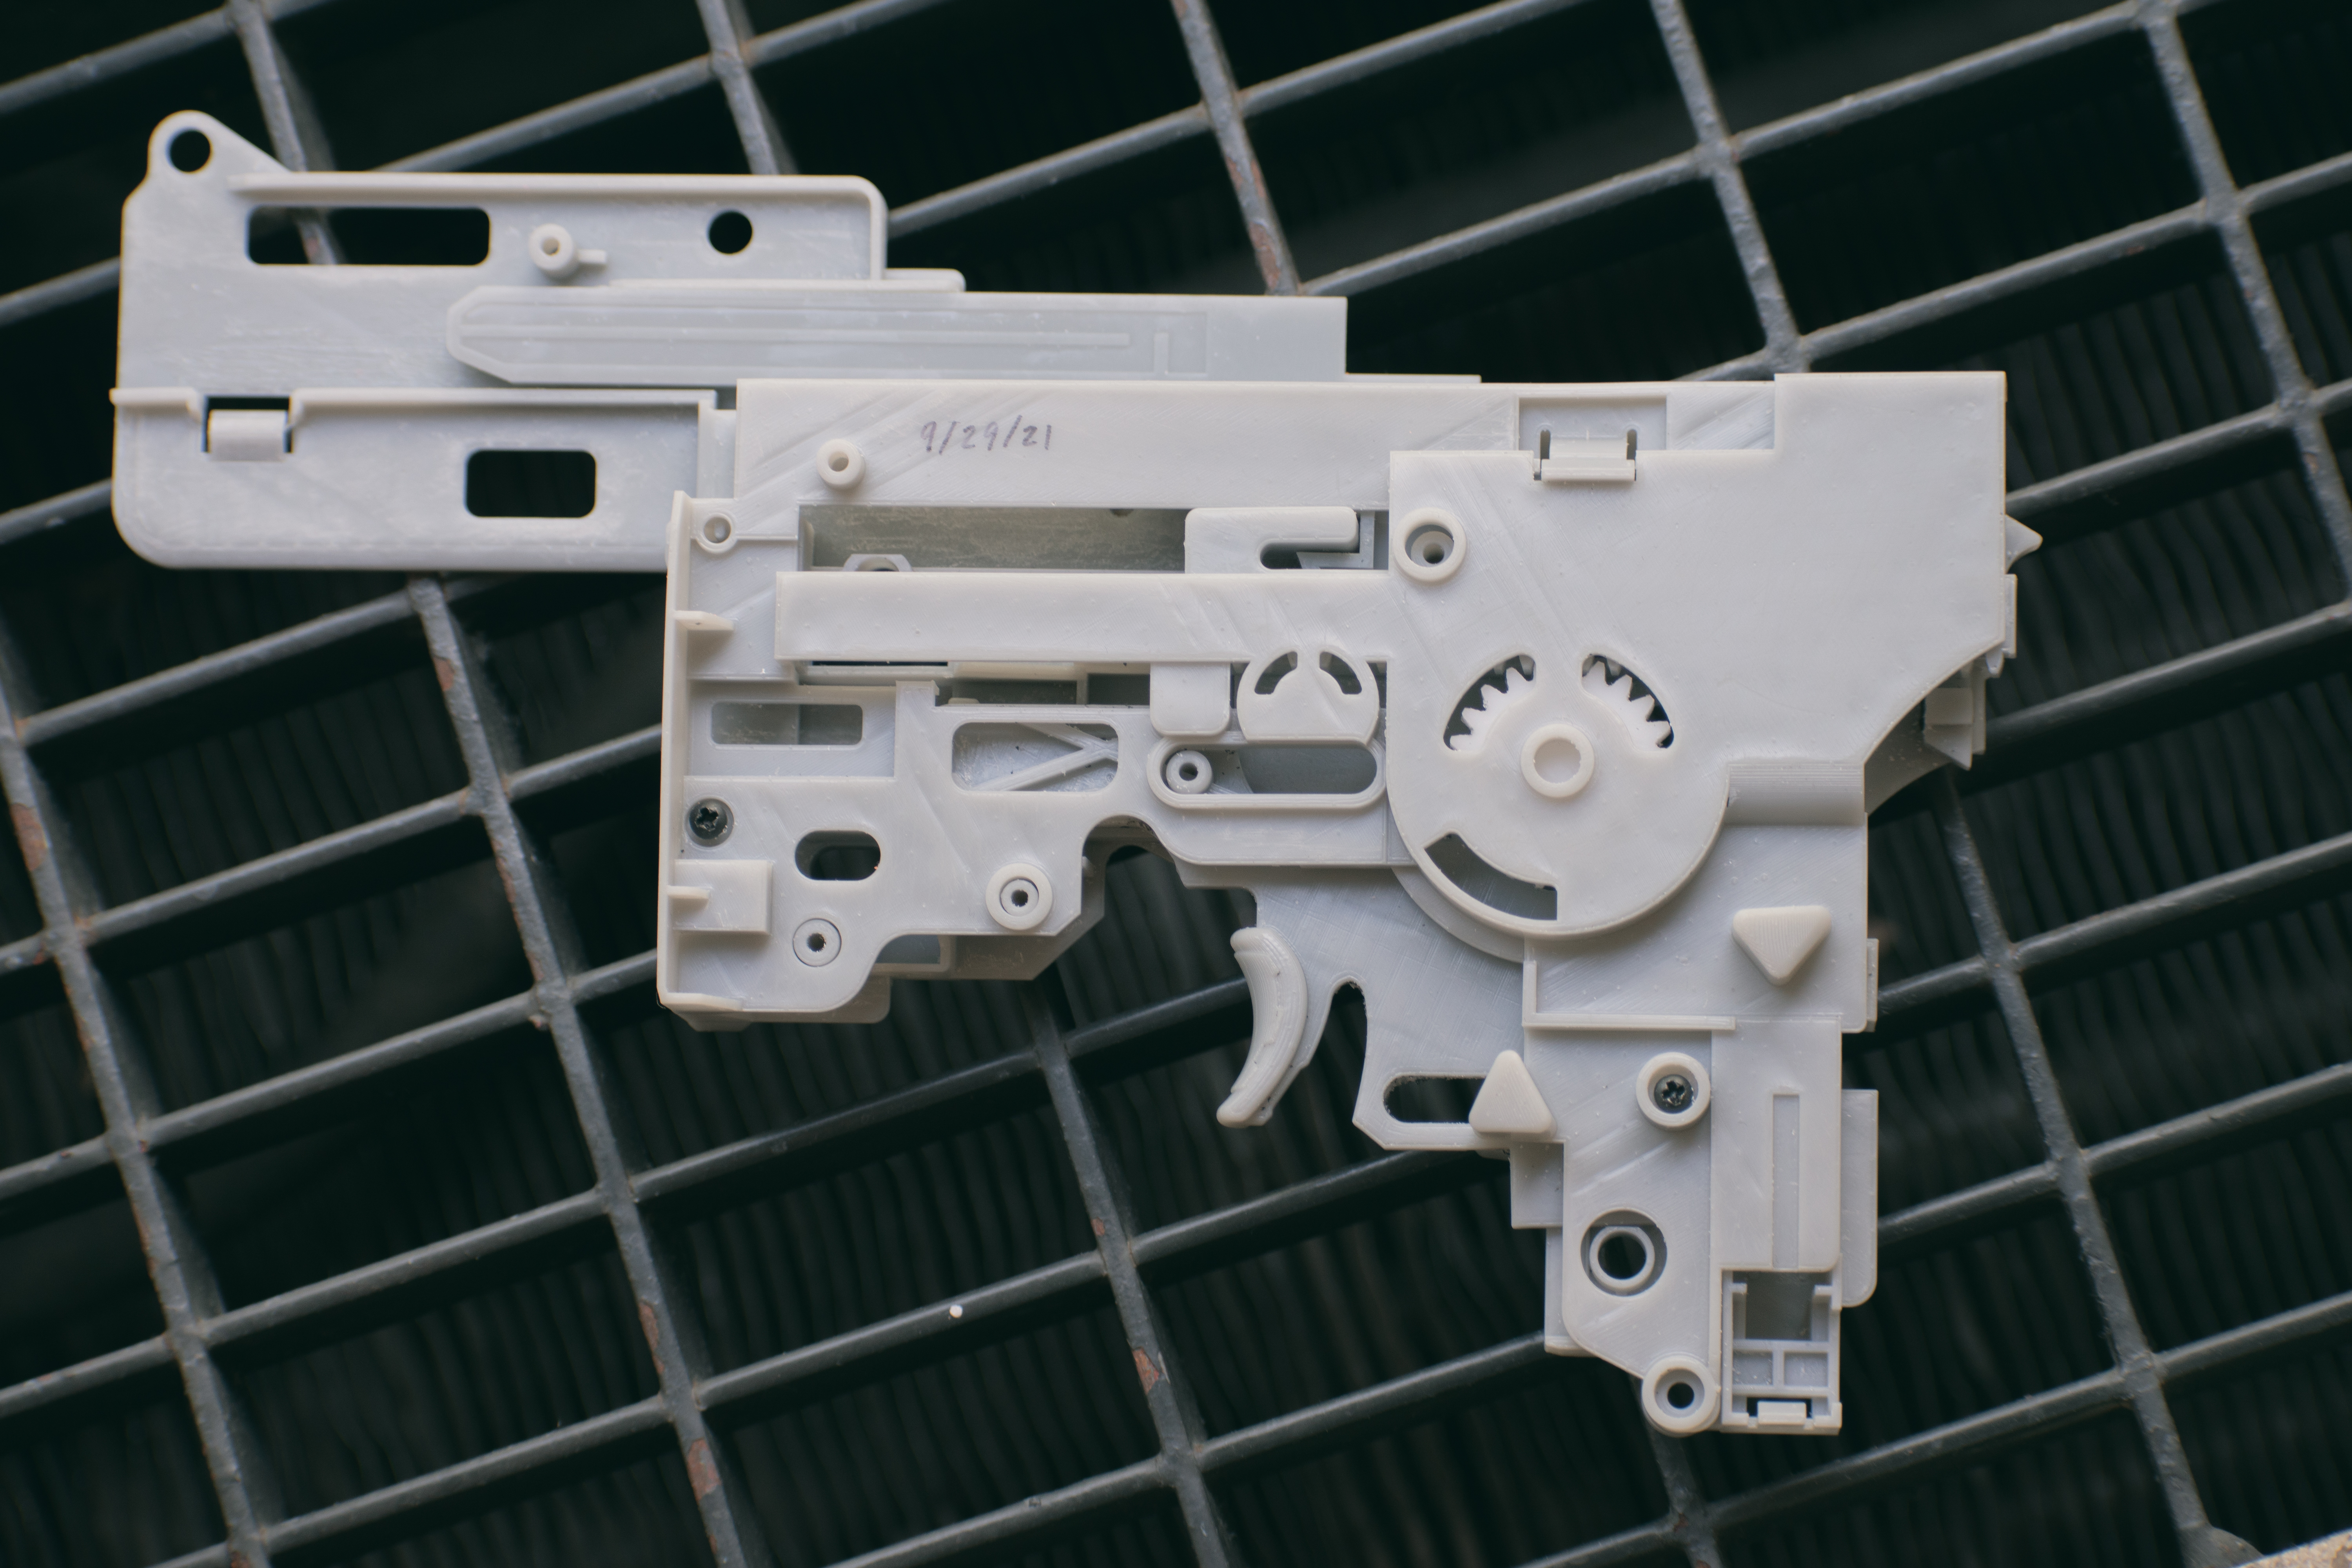
4: Rapid Prototyping
Once the CAD designs are finalized, I send the STL files to be printed in our model shop. When the prints are ready, I assemble the mechanism, using a Dremel if there are interfering parts, not enough tolerance, or too much friction. At times, I need to desolder and resolder wires back together.
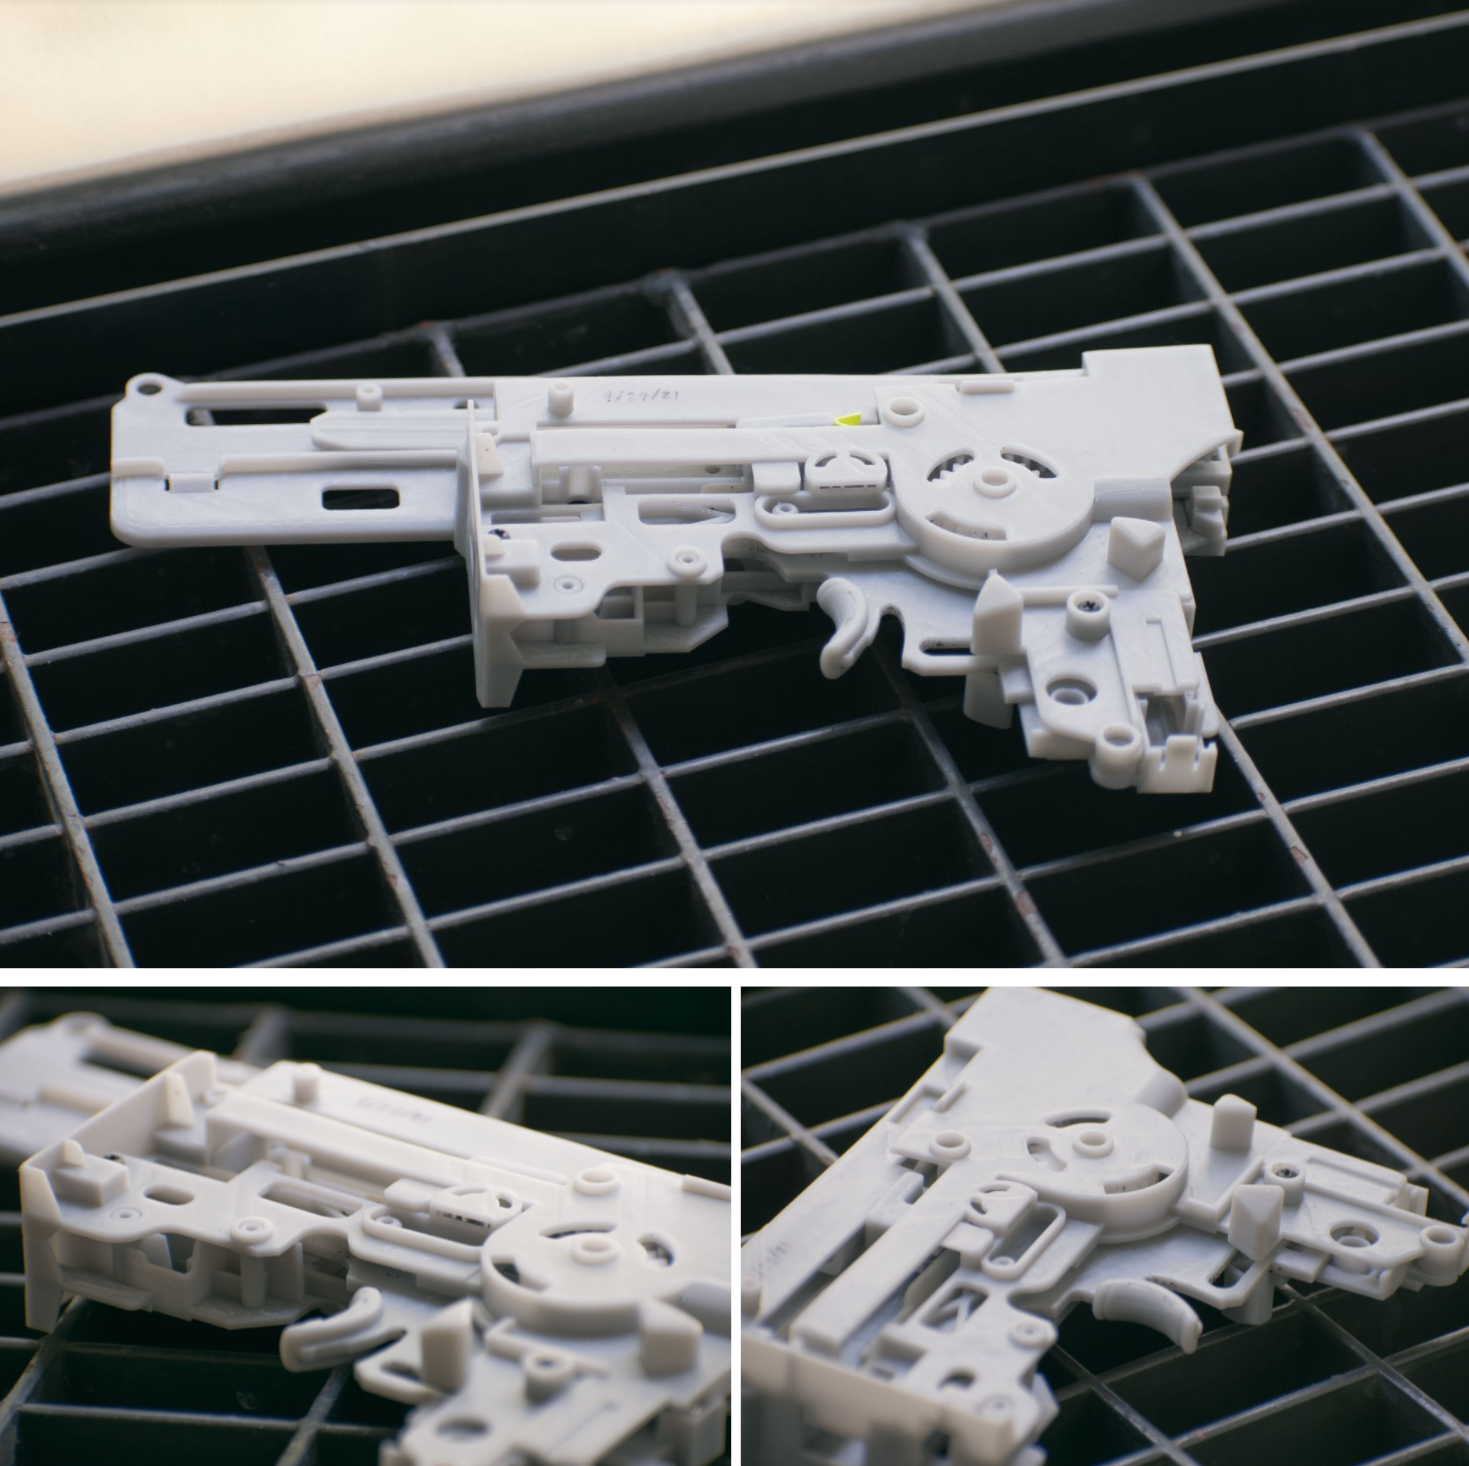
5: Iteration
For each mechanism version, the changes I make are then updated to be reflected in the CAD. Parts are modified, reprinted, and assembled once more. This iterative process repeats until the mechanism is refined – mechanically, ergonomically, and economically.
6: Final Prototype
The final mechanism is inserted into either an existing Ultra Amp exterior shell, or a modified one that I’ve designed. This prototype is then shown to other people on the NERF team and/or brought to the kid testing ranges to get user feedback.
If all goes well, my mechanisms might end up on the shelves!

Rival Barrel DOE
The Rival product line is a series of motorized blasters that fire yellow foam rounds. For this project, I was tasked with designing new barrels to improve the shot accuracy of a Rival blaster.
I decided to use Design of Experiments (DOE), since multiple factors may affect accuracy – factors such as length, curve diameter, bore diameter, and surface texture.
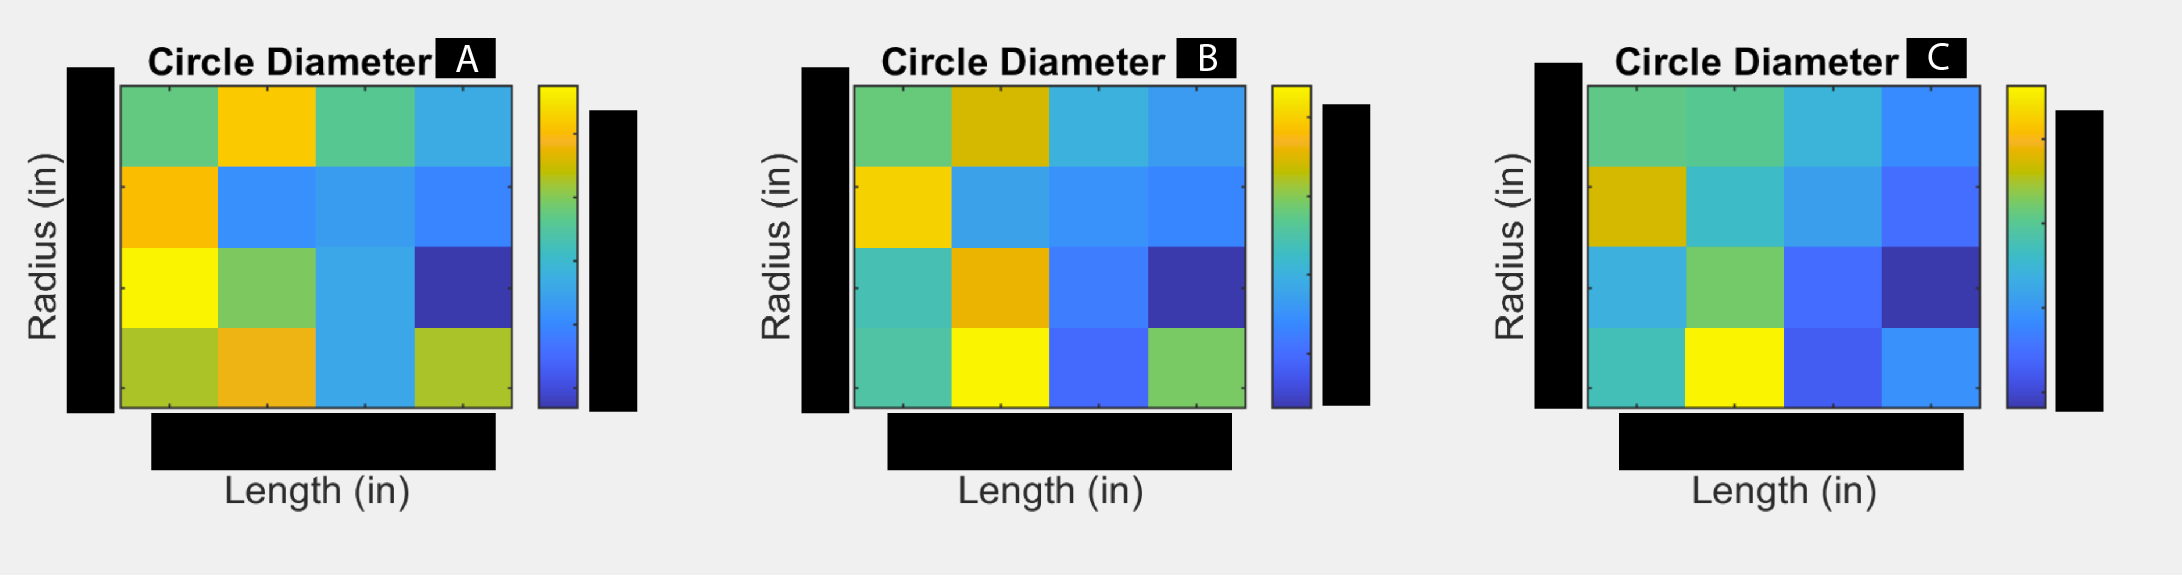
My DOE test compared curve diameter with barrel length. I tested 4 diameters against 4 lengths, creating a 4x4 matrix of barrel designs (16 in total) to test.
After the 16 barrel designs had been printed, tested, and recorded, I used MATLAB to code a color map, better visualizing the results of the DOE. With this analysis, we honed in on the barrel with the best performance.
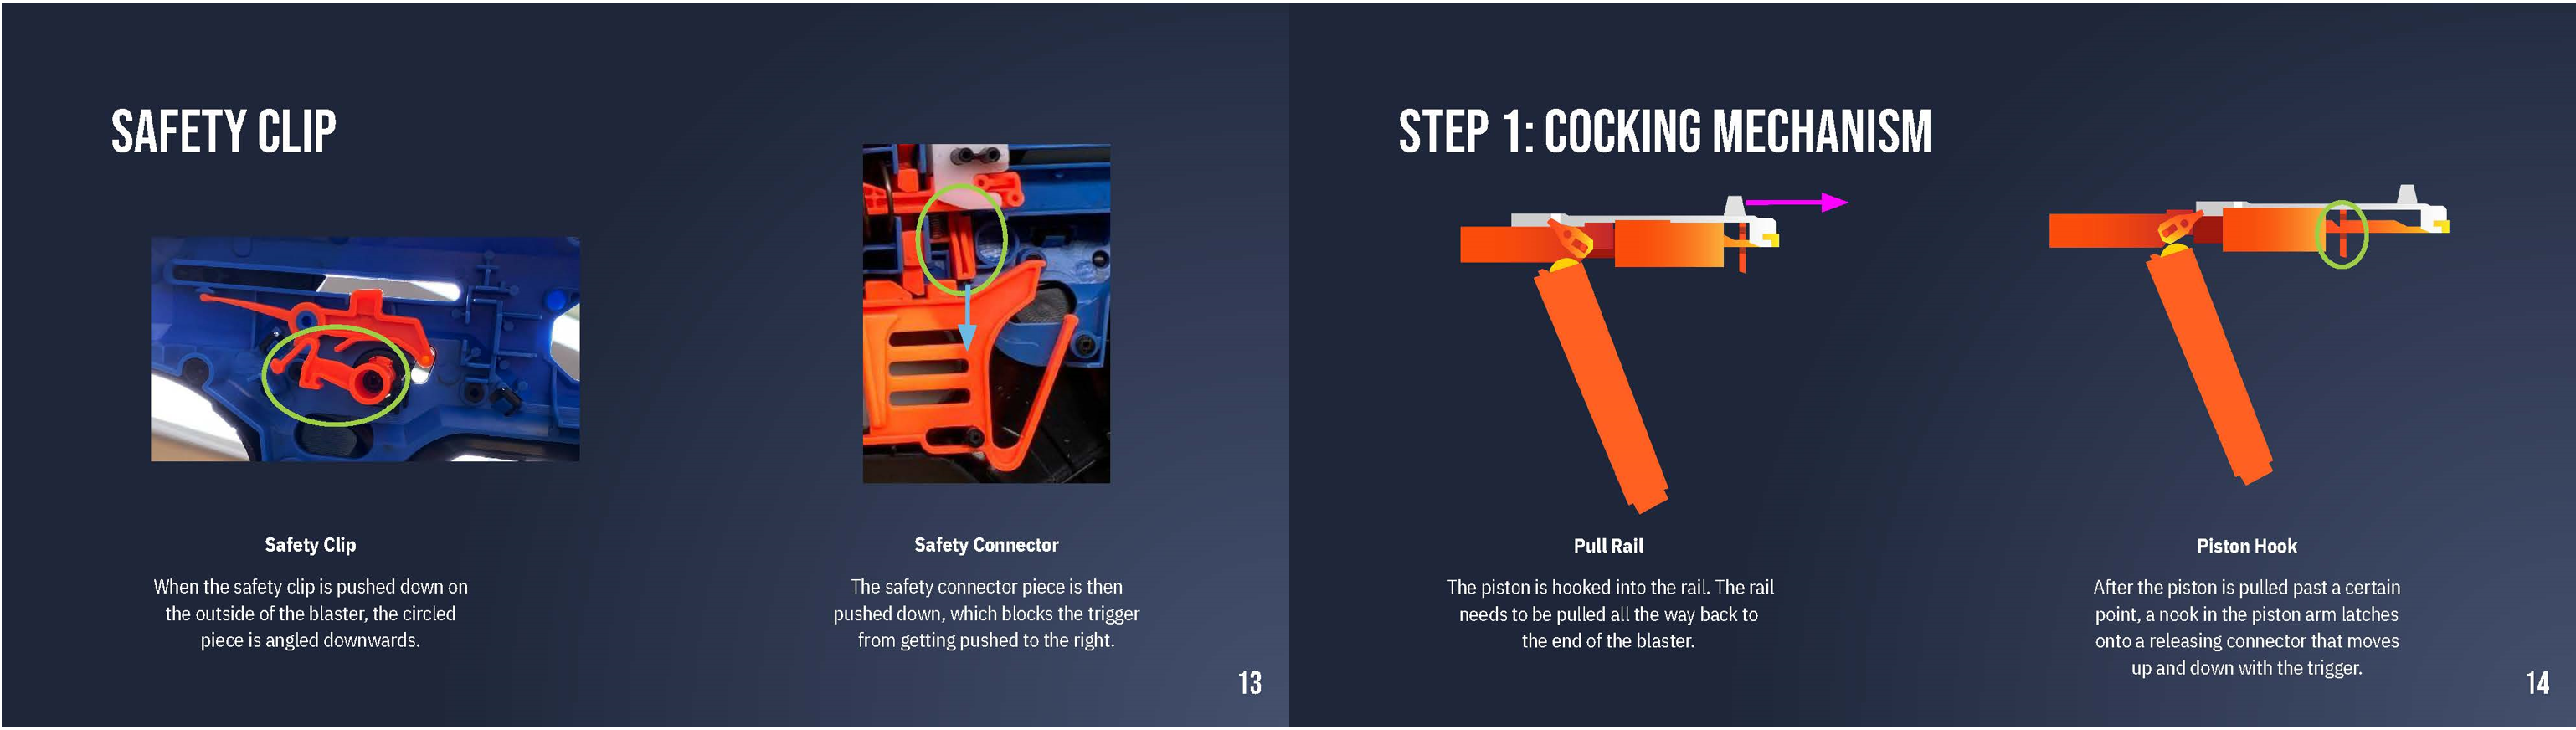
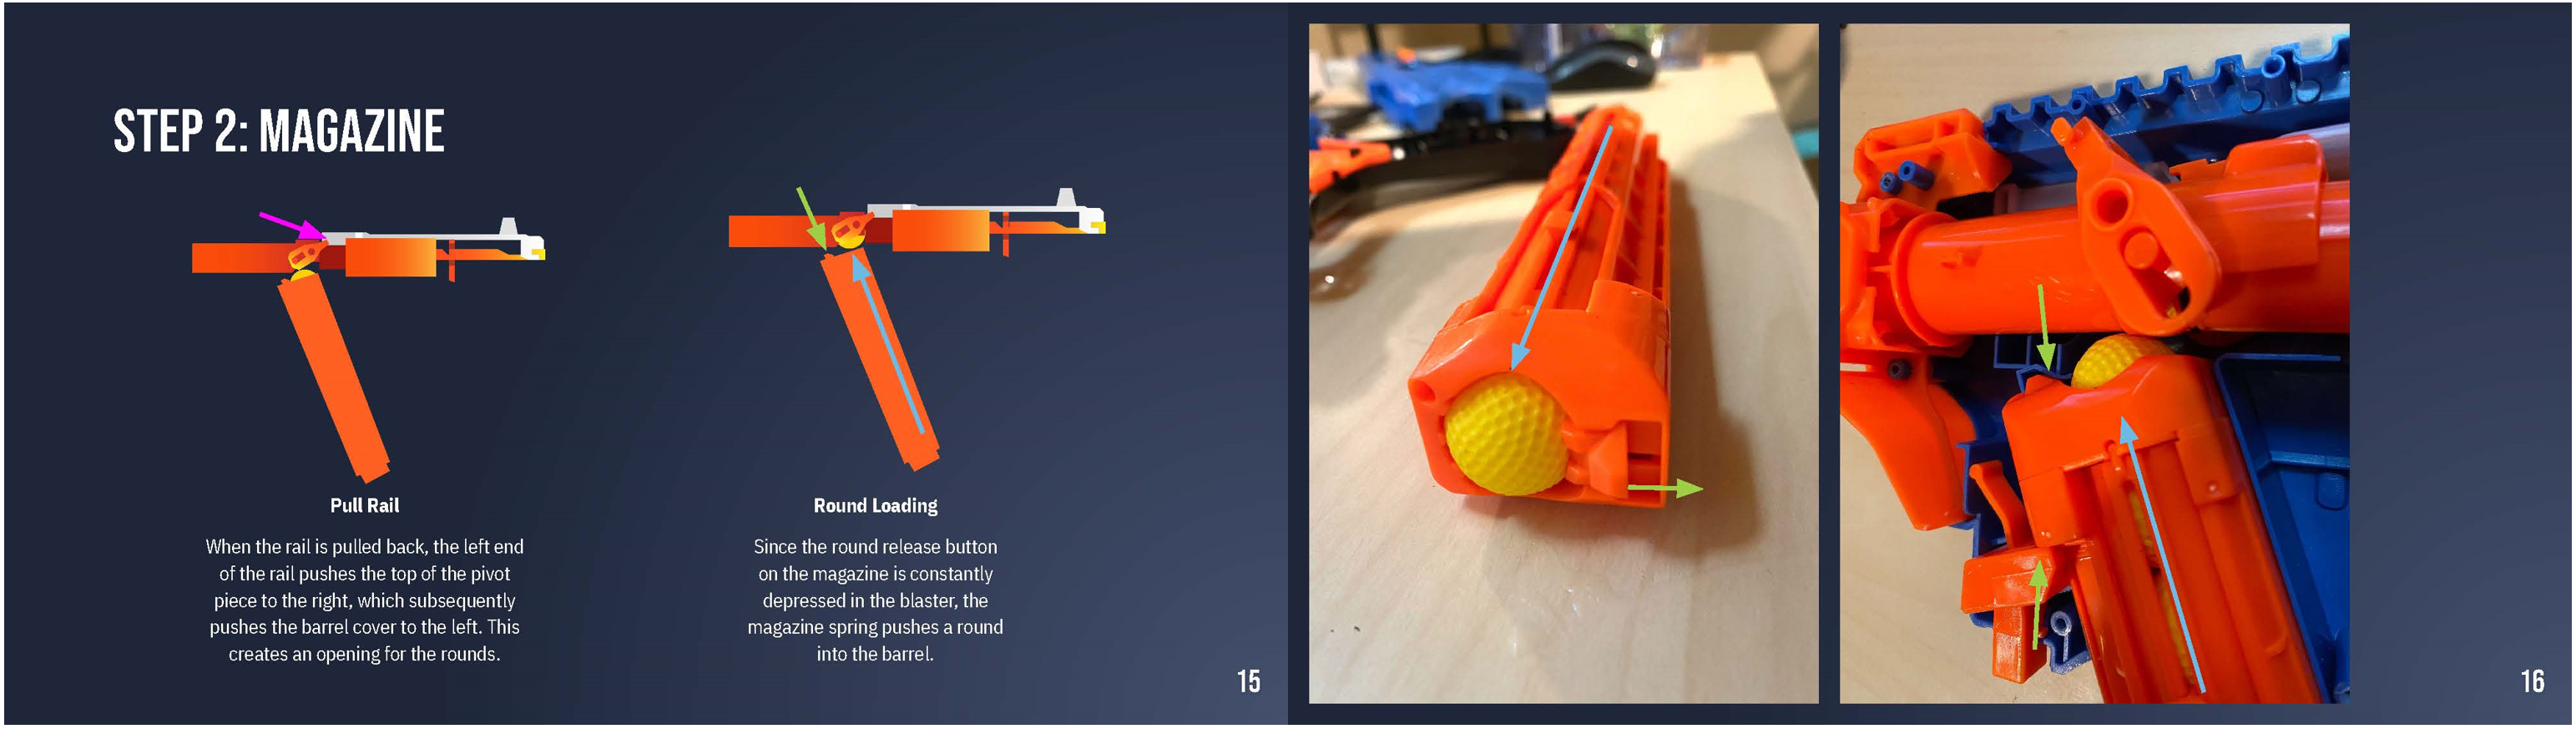
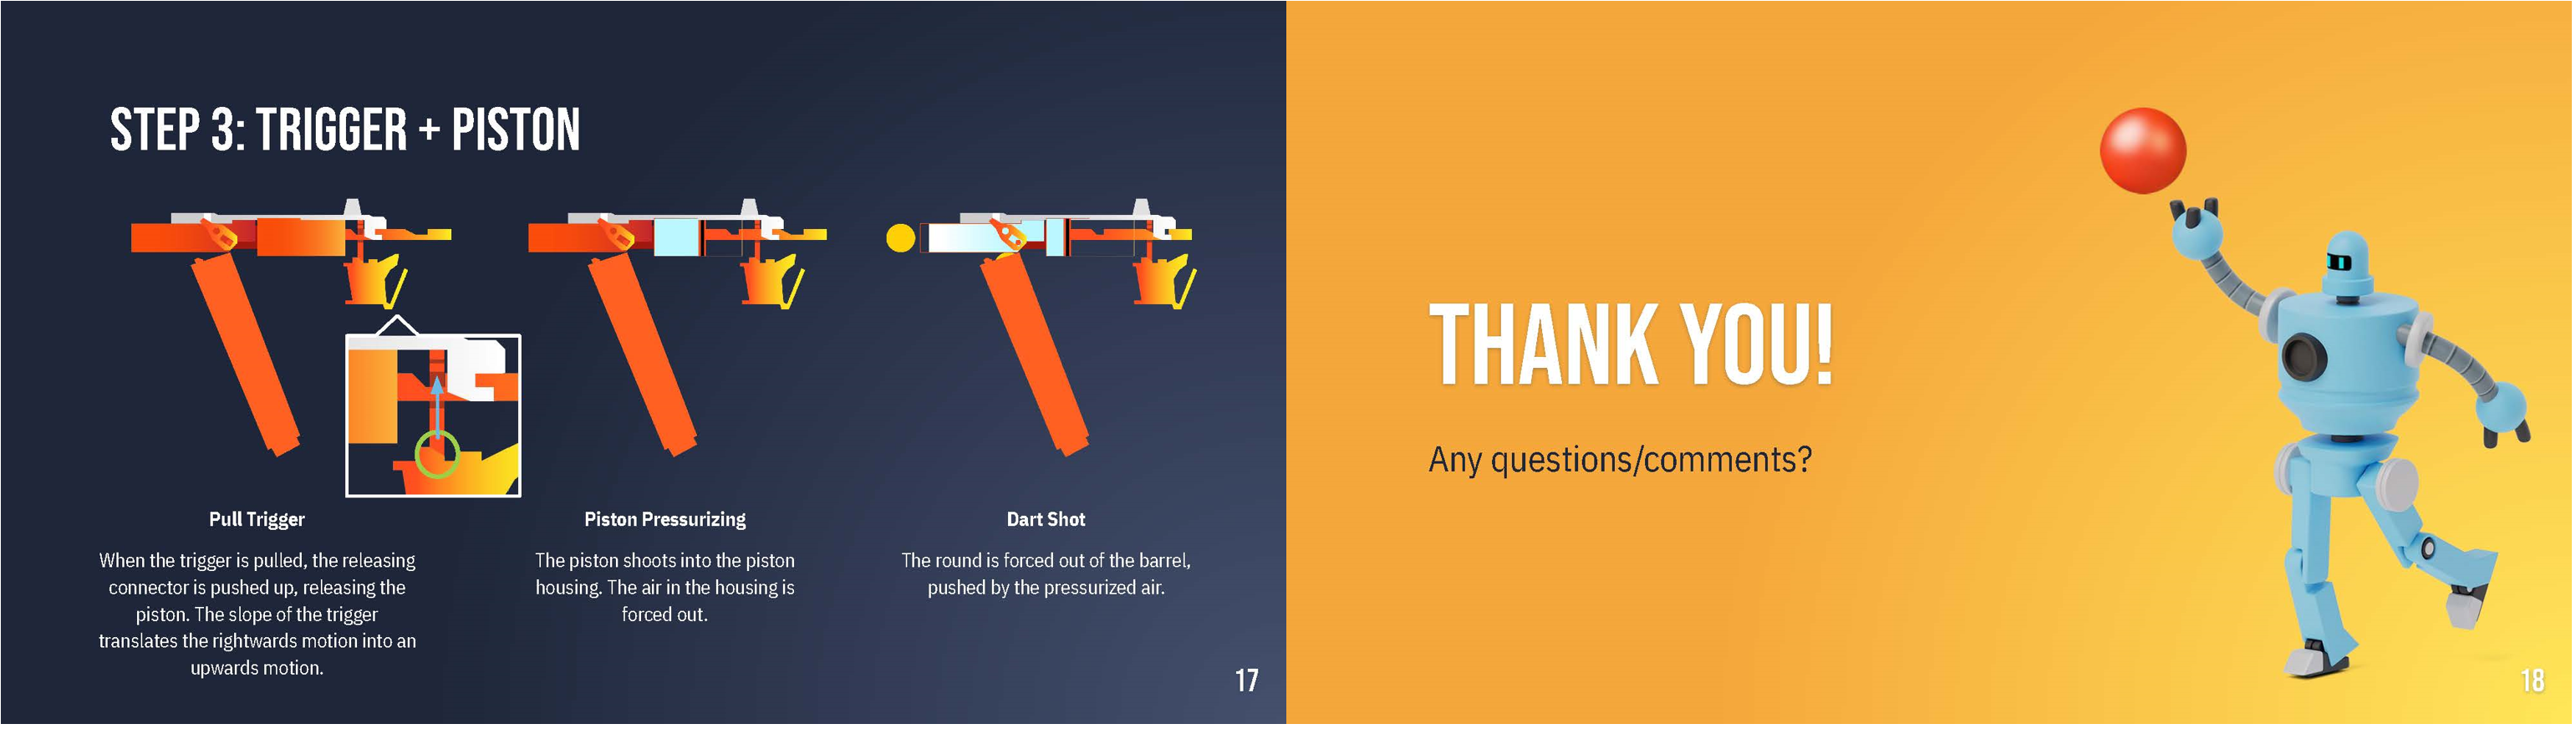
Mechanism Presentation
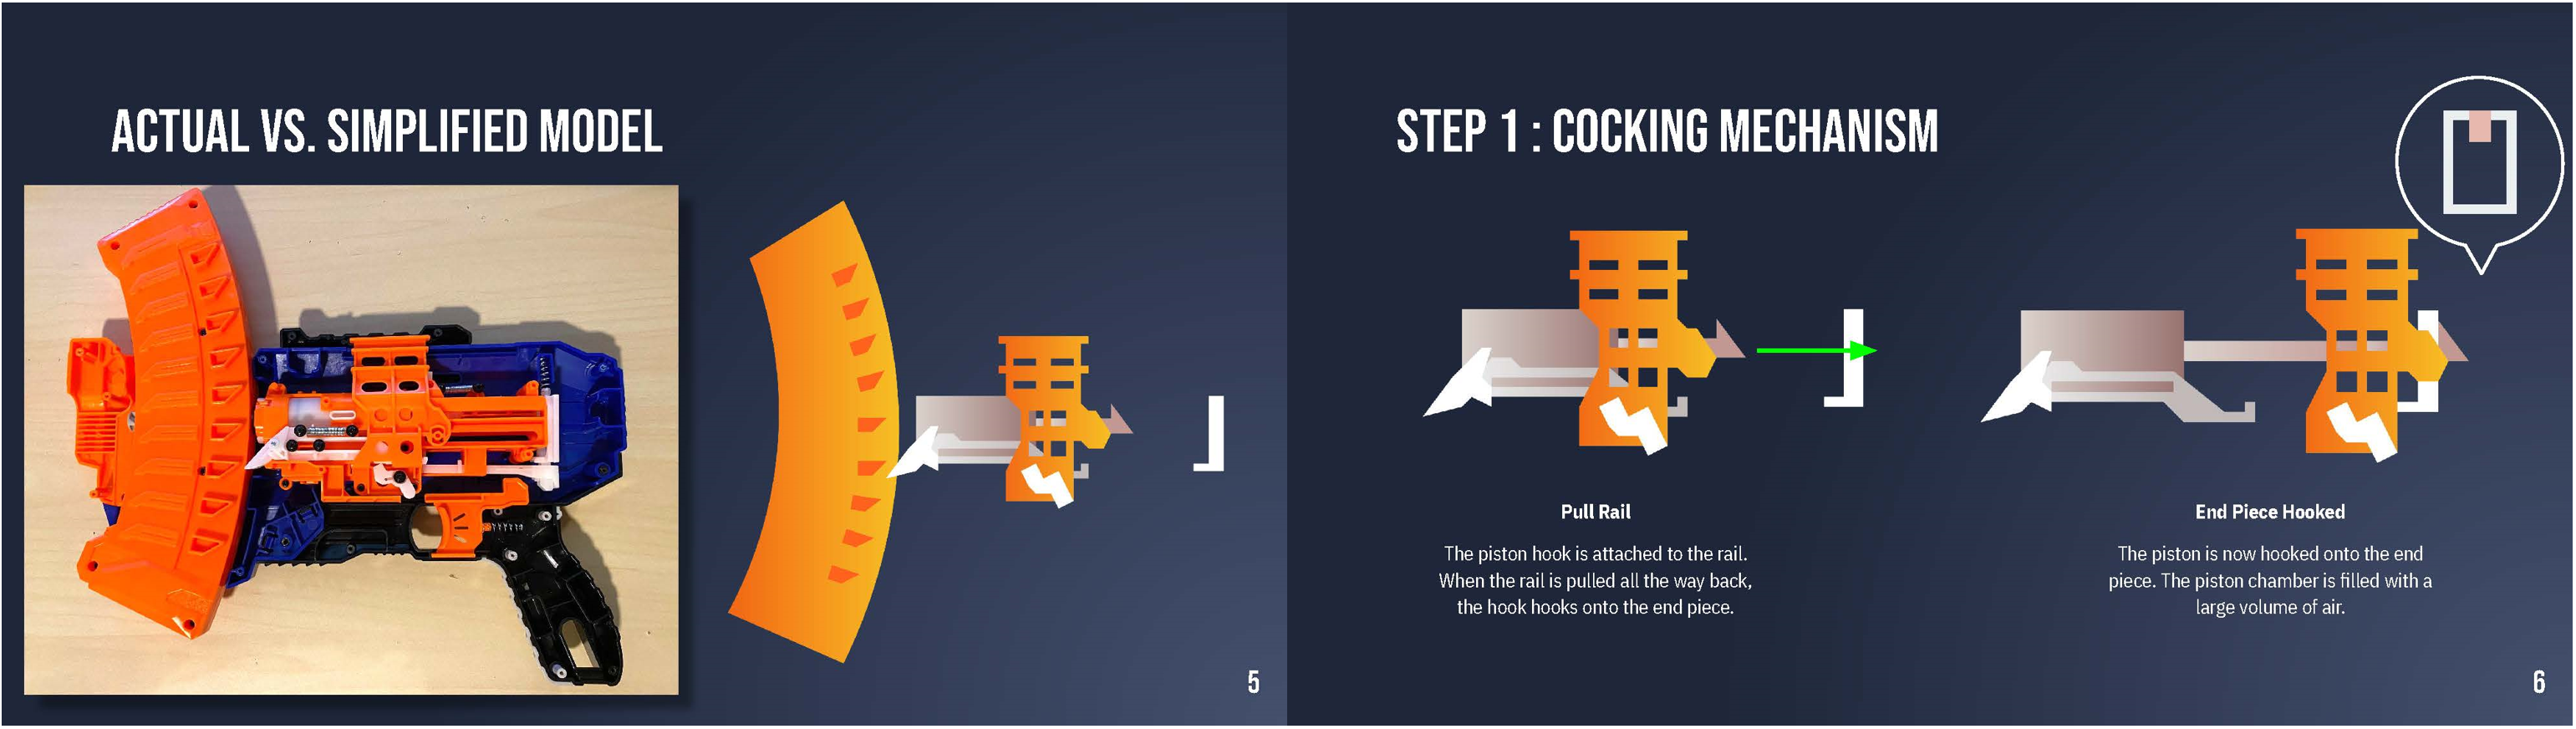
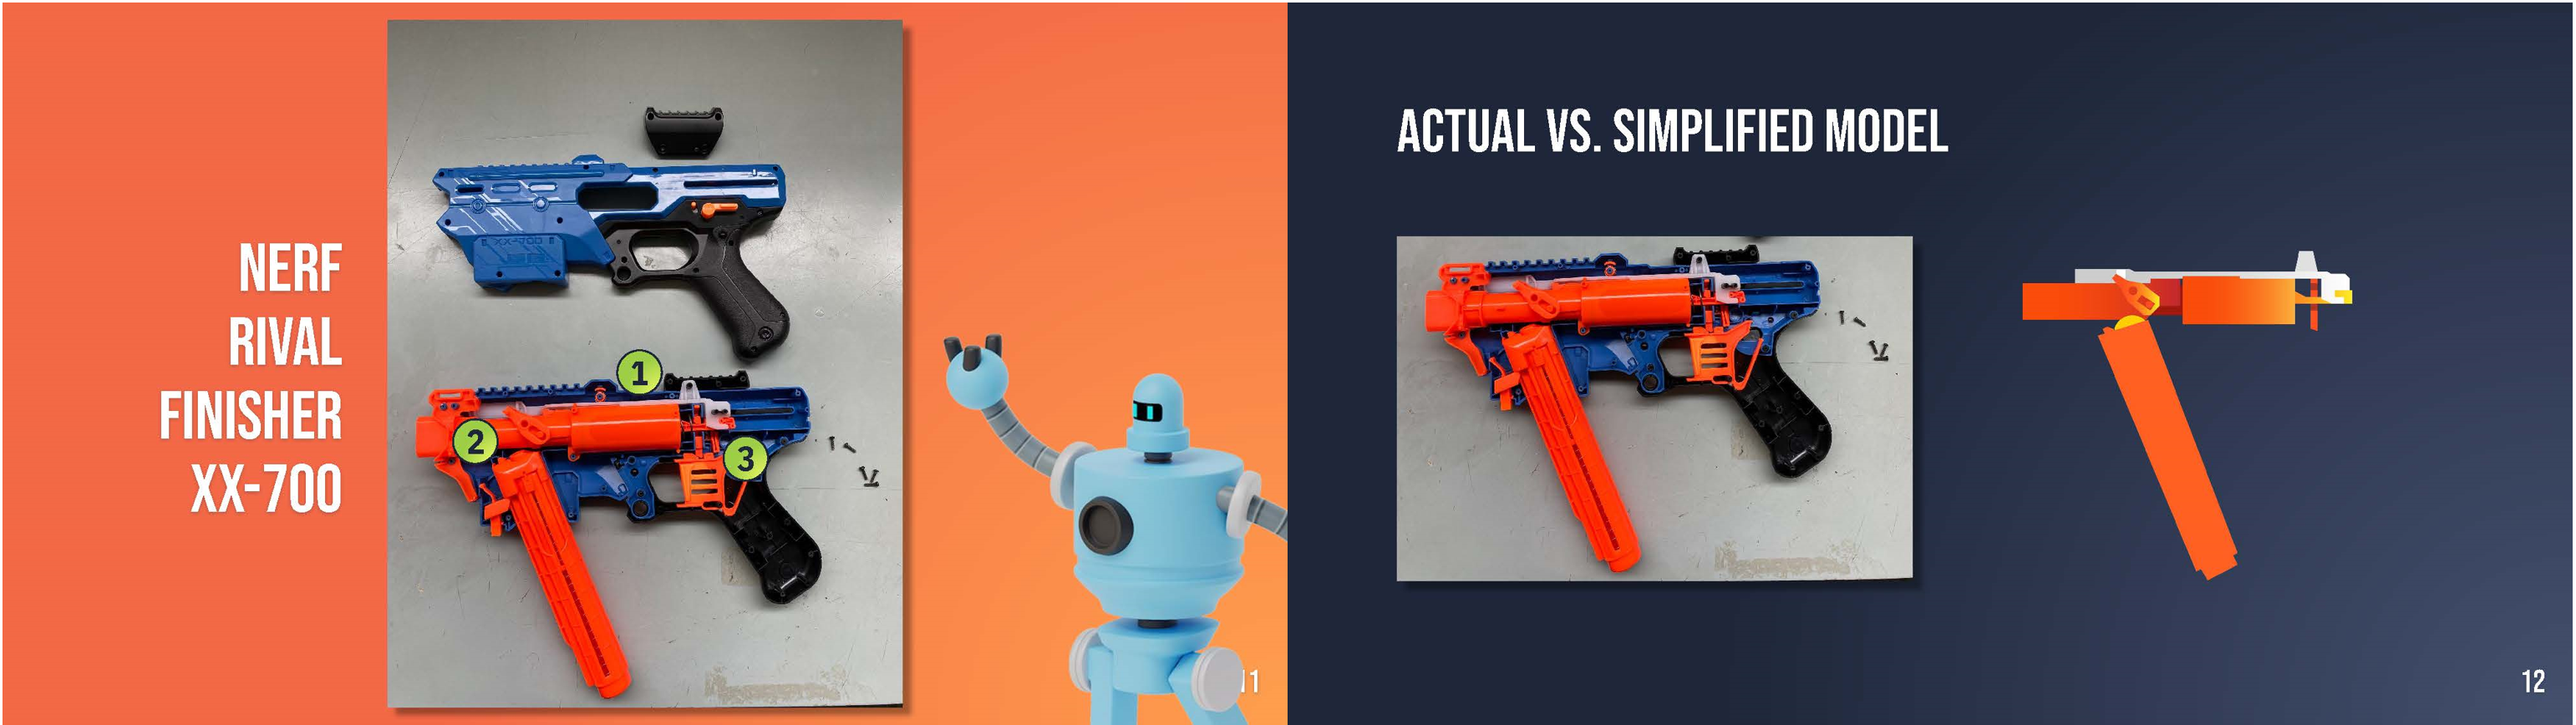
On the second day of my co-op, I was tasked with taking two blasters apart (NERF N-Strike Elite Rukkus ICS-8 and NERF Rival Finisher XX-700), observe the mechanisms, and make a presentation on them.
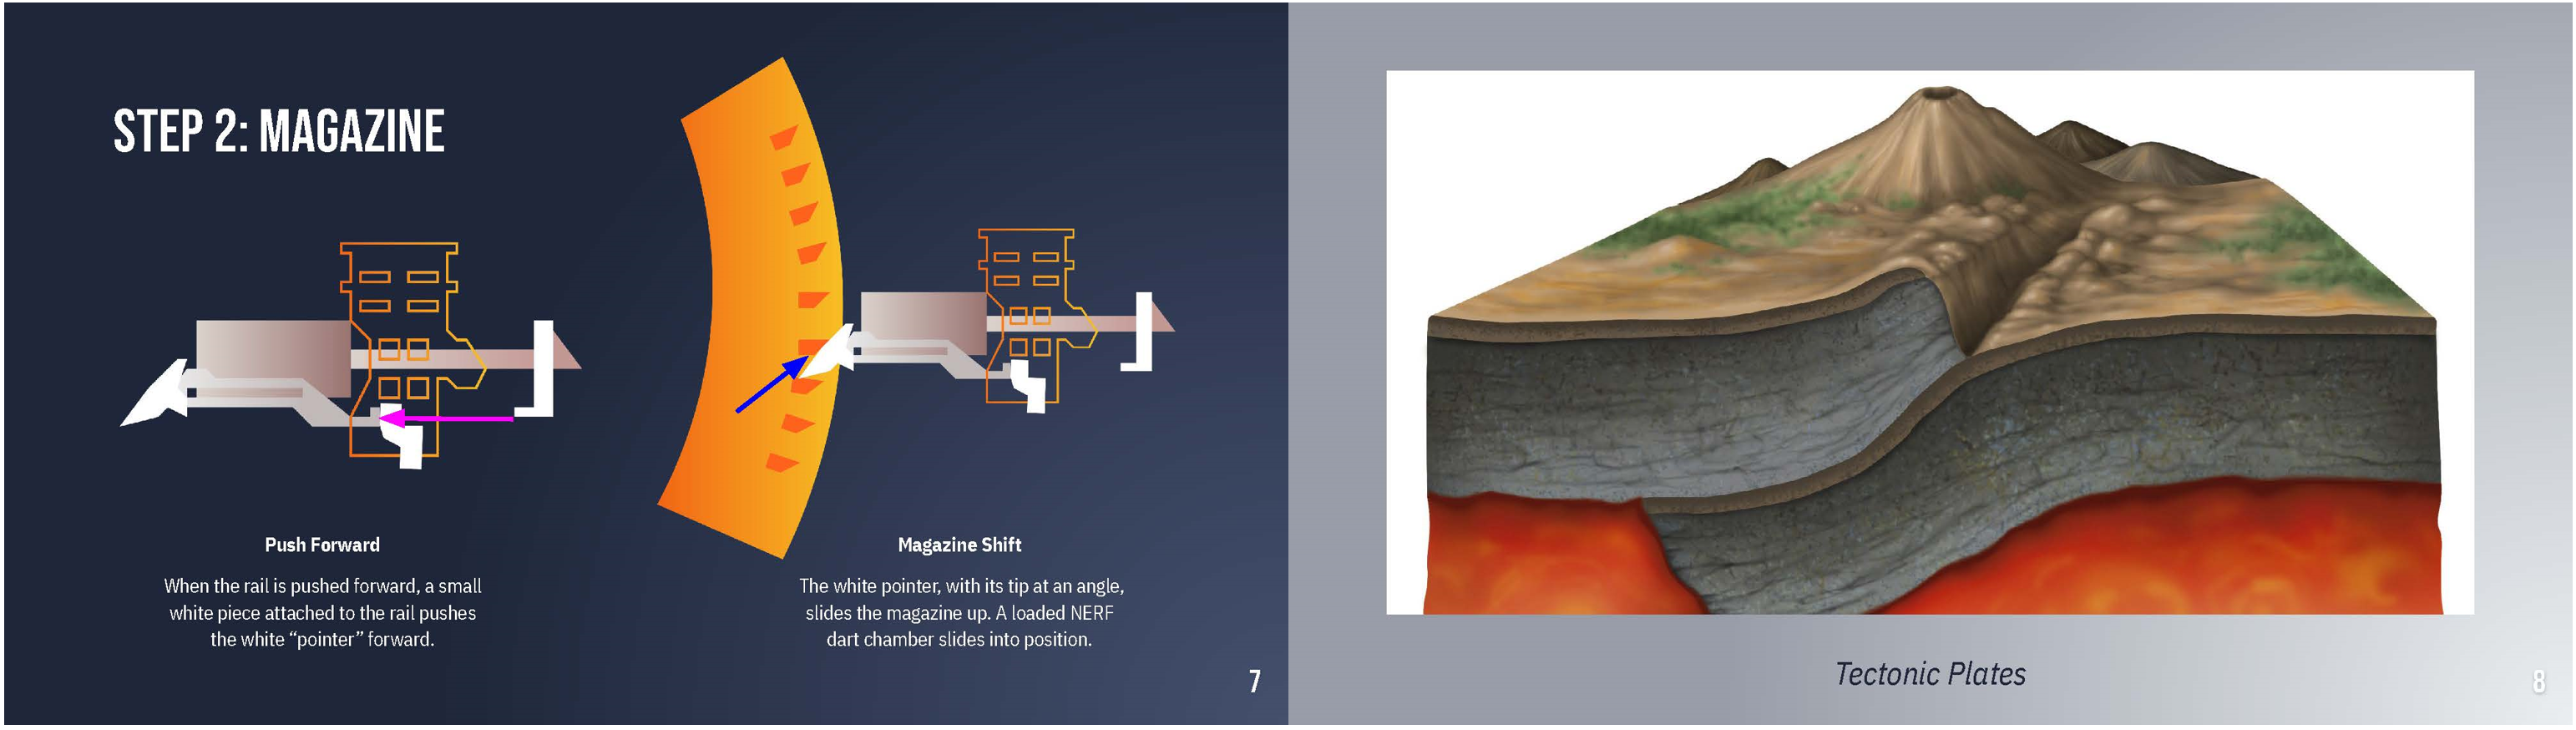
I figured explaining mechanisms in words would be too cumbersome to follow along, so I personally made graphics in Adobe Illustrator to present the mechanisms.